How to paint Motorcycle?
Harley Paintin' The Under-funded and Under-skilled
PREFACE
We have no skill with a paint weapon, so normally We had written several articles about artwork motorbikes without skill (see below). These articles are 8-9 yrs old and suggest making use of lacquer. It worked well, however the 10per cent ethanol they today added gas eats through it. Most spraycan paint is lacquer. Too bad, it was friendly material.
The approaches to the articles work just as well with modern basecoat/clearcoat finishes along with catalyzed acrylic enamel. You will do require a slightly better weapon. I prefer a $70 Porter Cable HVLP weapon. (Get an inexpensive water pitfall) I prefer the same rattle-can spray gray sandable primer/filler such as this article. It works fine. The basic idea is; Spray really light coats. Where in fact the will says "medium wet", we cringe. Should they say 2 coats, I shoot 4-5 EXTREMELY LIGHT coats. It generally does not move on in addition to a wet coating will, but I get drips trying for wet coats, therefore don't make any damn huge difference, anyway! We intend to get our gloss shine inside final color-wetsand and buffing stages. What is the point when trying for high-gloss application if we're going to sand it anyhow? Cannot sand between coats.
Easy and simple is catalyzed acrylic enamel, solid-color. Your photos have to go on the area. (luckily, i am not a graphics man.) It goes on in one step and that can be wet-sanded and buffed exactly like lacquer. The gloss is very good, perhaps simply not rather since "deep" as basecoat/clearcoat. You will do require a mask, natural vapor, not a paper dust mask, for any of these. They don't cost a lot. These fumes could be harmful and also explosive. No available flames or sparks!
If you prefer the layouts under clearcoat, then you need a basecoat/clearcoat finish. Combine and reduce the material just as per the instructions. The auto paint store may have cheap measuring glasses. You cannot store it after it is catalyzed, therefore comprise a little bit for the test/practice piece.The two major differences through the articles tend to be:
- This stuff gets TRICKY. Sand and polish the very next day without a doubt. Make use of just a little dish detergent in the water as a lubricant, sand with #800 before the mottled effect is fully gone along with a consistent dull finish, then #1200 to get out the sanding scars from #800. I buff first with Meguiar's no. 2 fine-cut Cleaner, after that go right to the # 9 Swirl Remover. Use only foam pads. You can get foam shields that may work with an electrical exercise at
- You cannot end halfway through the clearcoats to sand while don't have to. You can easily stop to include pictures. Result in the after that two coats really fine mist coats, to secure the edges of decals without assaulting all of them, after that choose a couple regular (light) coats. All of those other approaches to this article assist these finishes. Training on test pieces and use LIGHT coats.
For little jobs, "Dupli-Color" ( makes spray can enamel. The colors are limited, nonetheless it generally seems to work very well. There was a clearcoat. Don't hurry it, let the specified dried out time between coats. If you recoat a partially healed level, it will take forever to dry. I haven't tested it with gasoline, but, as an enamel, We think it should be OK. If you have never painted before, this could be a cheap solution to exercise. Get a spraycan "trigger" through the equipment shop, after that prime and color a small project. You'll get the "feel" from it rapidly.
You certainly will surprise yourself!
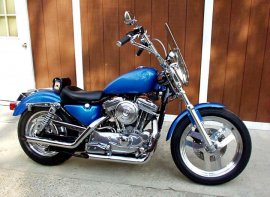 The Sportster that is the subject for this article AFTER being refurbished and painted.
The prior owner of my '96 Sporty obviously saved his polishing towels in his children's sandbox. The paint appeared as if it had been cleaned with #1 steel wool. There were several dings, a fairly great kink within the rear fender, and it needed a larger container. I was surely set for a paint task.
In Peoples' Republic of New Jersey a fundamental single-color repaint on a Harley costs $1500. Easily desired the 74 cubic inch big-bore system, and I did, I quickly had been lookin' in the painter in my mirror, plus the mechanic.
Whenever Good Fairy turned up within my bassinet, she waved the woman small wand and intoned, "you'll be quick and broad, but you'll keep your locks. You're going to be a beneficial Infantry ship commander, a middling rider, a good cabinetmaker, but you'll never ever be any really great with a paint weapon."
I-come from an occasion once we did a lot of our own work, for lack of money. We had stickers on our cars nevertheless "Edelbrock" and "Holley." Today's young ones have actually stickers, also. They say "Sony" and "Panasonic."
I've had to do some painting, and I'm however no damn great at it, but i've found a mix of methods and materials that really work. A whole thunderbungle most likely should not try, but whoever knows which end regarding the screwdriver going to the nail with, and who knows that Bondo actually a kinky porno web site, can color a bike. I just made it happen, and (he said modestly), it's freakin' stunning, much better than factory. It offers a-deep "wet look", although it's a couple of flaws, no-one can see all of them but me. Trust me, this was not the consequence of skill!
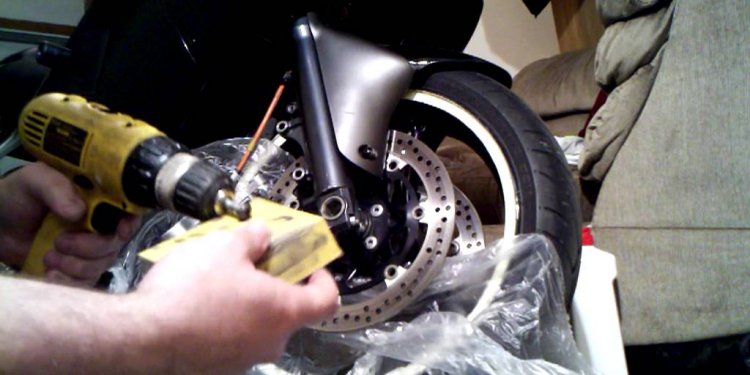
We eliminated the painted parts through the bicycle, that could be a discomfort in throat on a Sportster. H-D is inclined to pass through a line bundle through a hole, after that place a big, clunky connector from the wires that wont go back through gap. We painted the oil tank, headlight bowl, and ignition component cover (that your engine Company actually leaves black colored). I made inverted...
Share this article
Related Posts


Latest Posts


